How to install Ubuntu using UTM on macOS
I've recently started using UTM to run local virtual machines (VMs) on my M1 Mac. At the time of writing, I noticed that the official Ubuntu 22.04 gallery actually links to Ubuntu 20.04. Additionally, I encountered difficulties installing the UTM Ubuntu installer there since the setup requires a few adjustments that are not accommodated. Below are the steps I took to get Ubuntu installed and working. I link to a few ISO versions of Ubuntu for M1 Macs since regardless of OS version the same adjustments seem to apply.
Download an Ubuntu ISO image
- Download the Ubuntu ISO image you want to install [official releases]
- M1 (ARM) Macs: Ubuntu 24.04 | Ubuntu 22.04.4 | Ubuntu 20.04.5
- Note: If running an Intel Mac you'll need to search for the right ISO image
Create a New VM
- Open UTM on macOS and create a new VM.
- Link it to the Ubuntu ISO image you want to install in this case I'm using 24.04
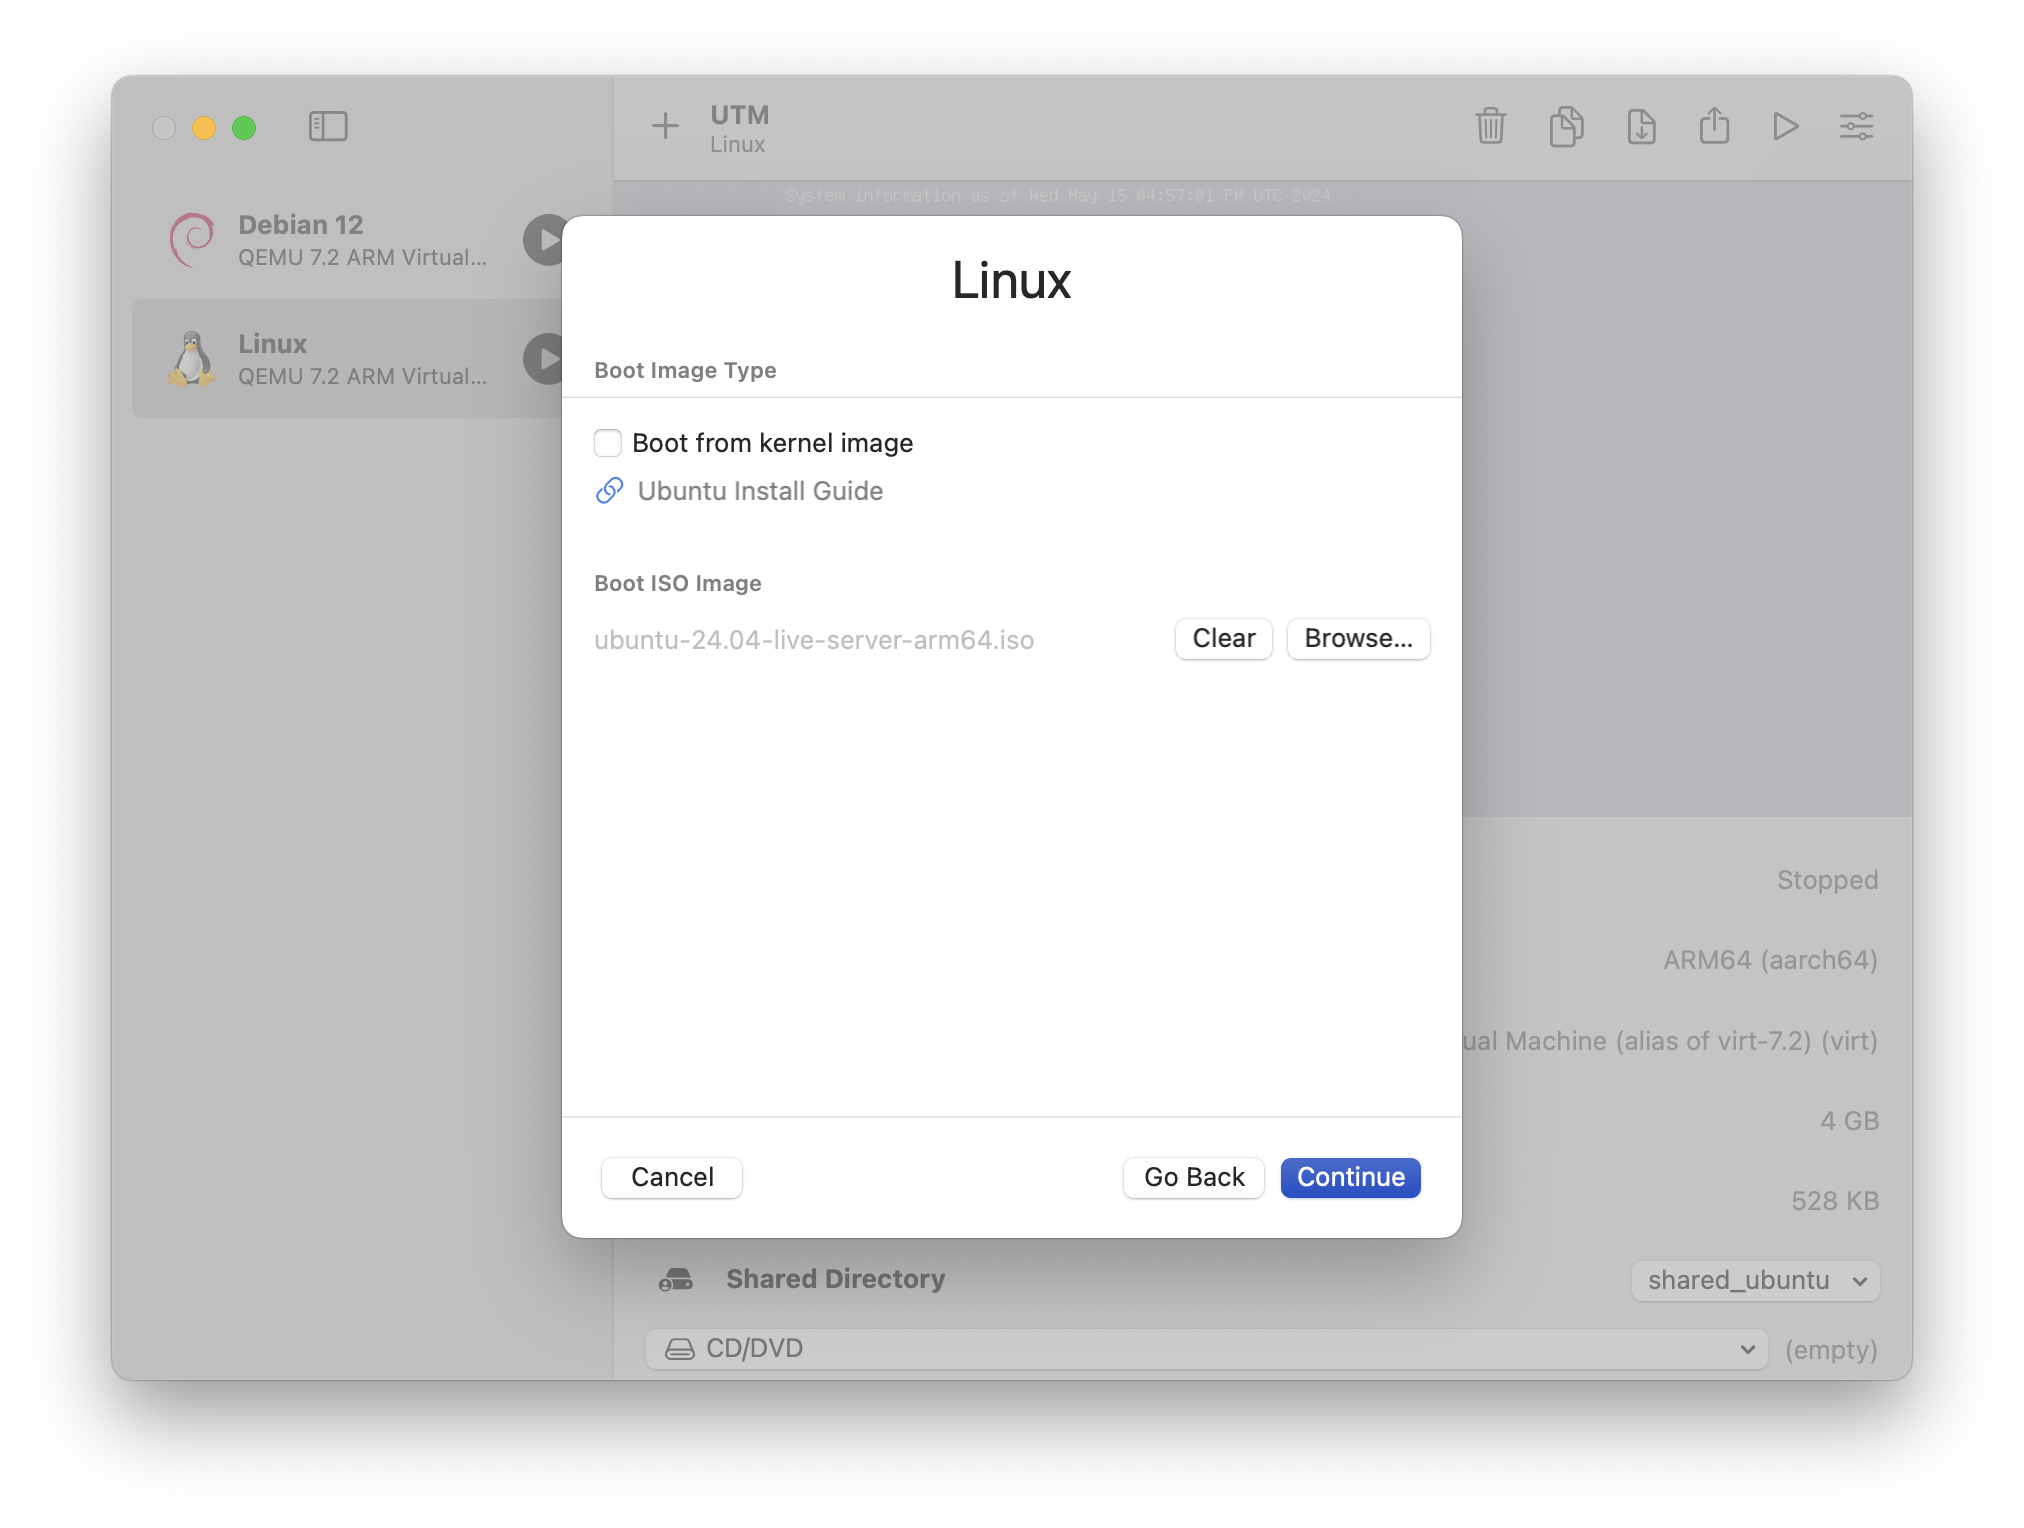
Ubuntu-24.04-live-server-arm64.iso has been selectedOpen VM Settings
- On the final
Summaryscreen, selectOpen VM settings. - Click
Saveto create the VM image.
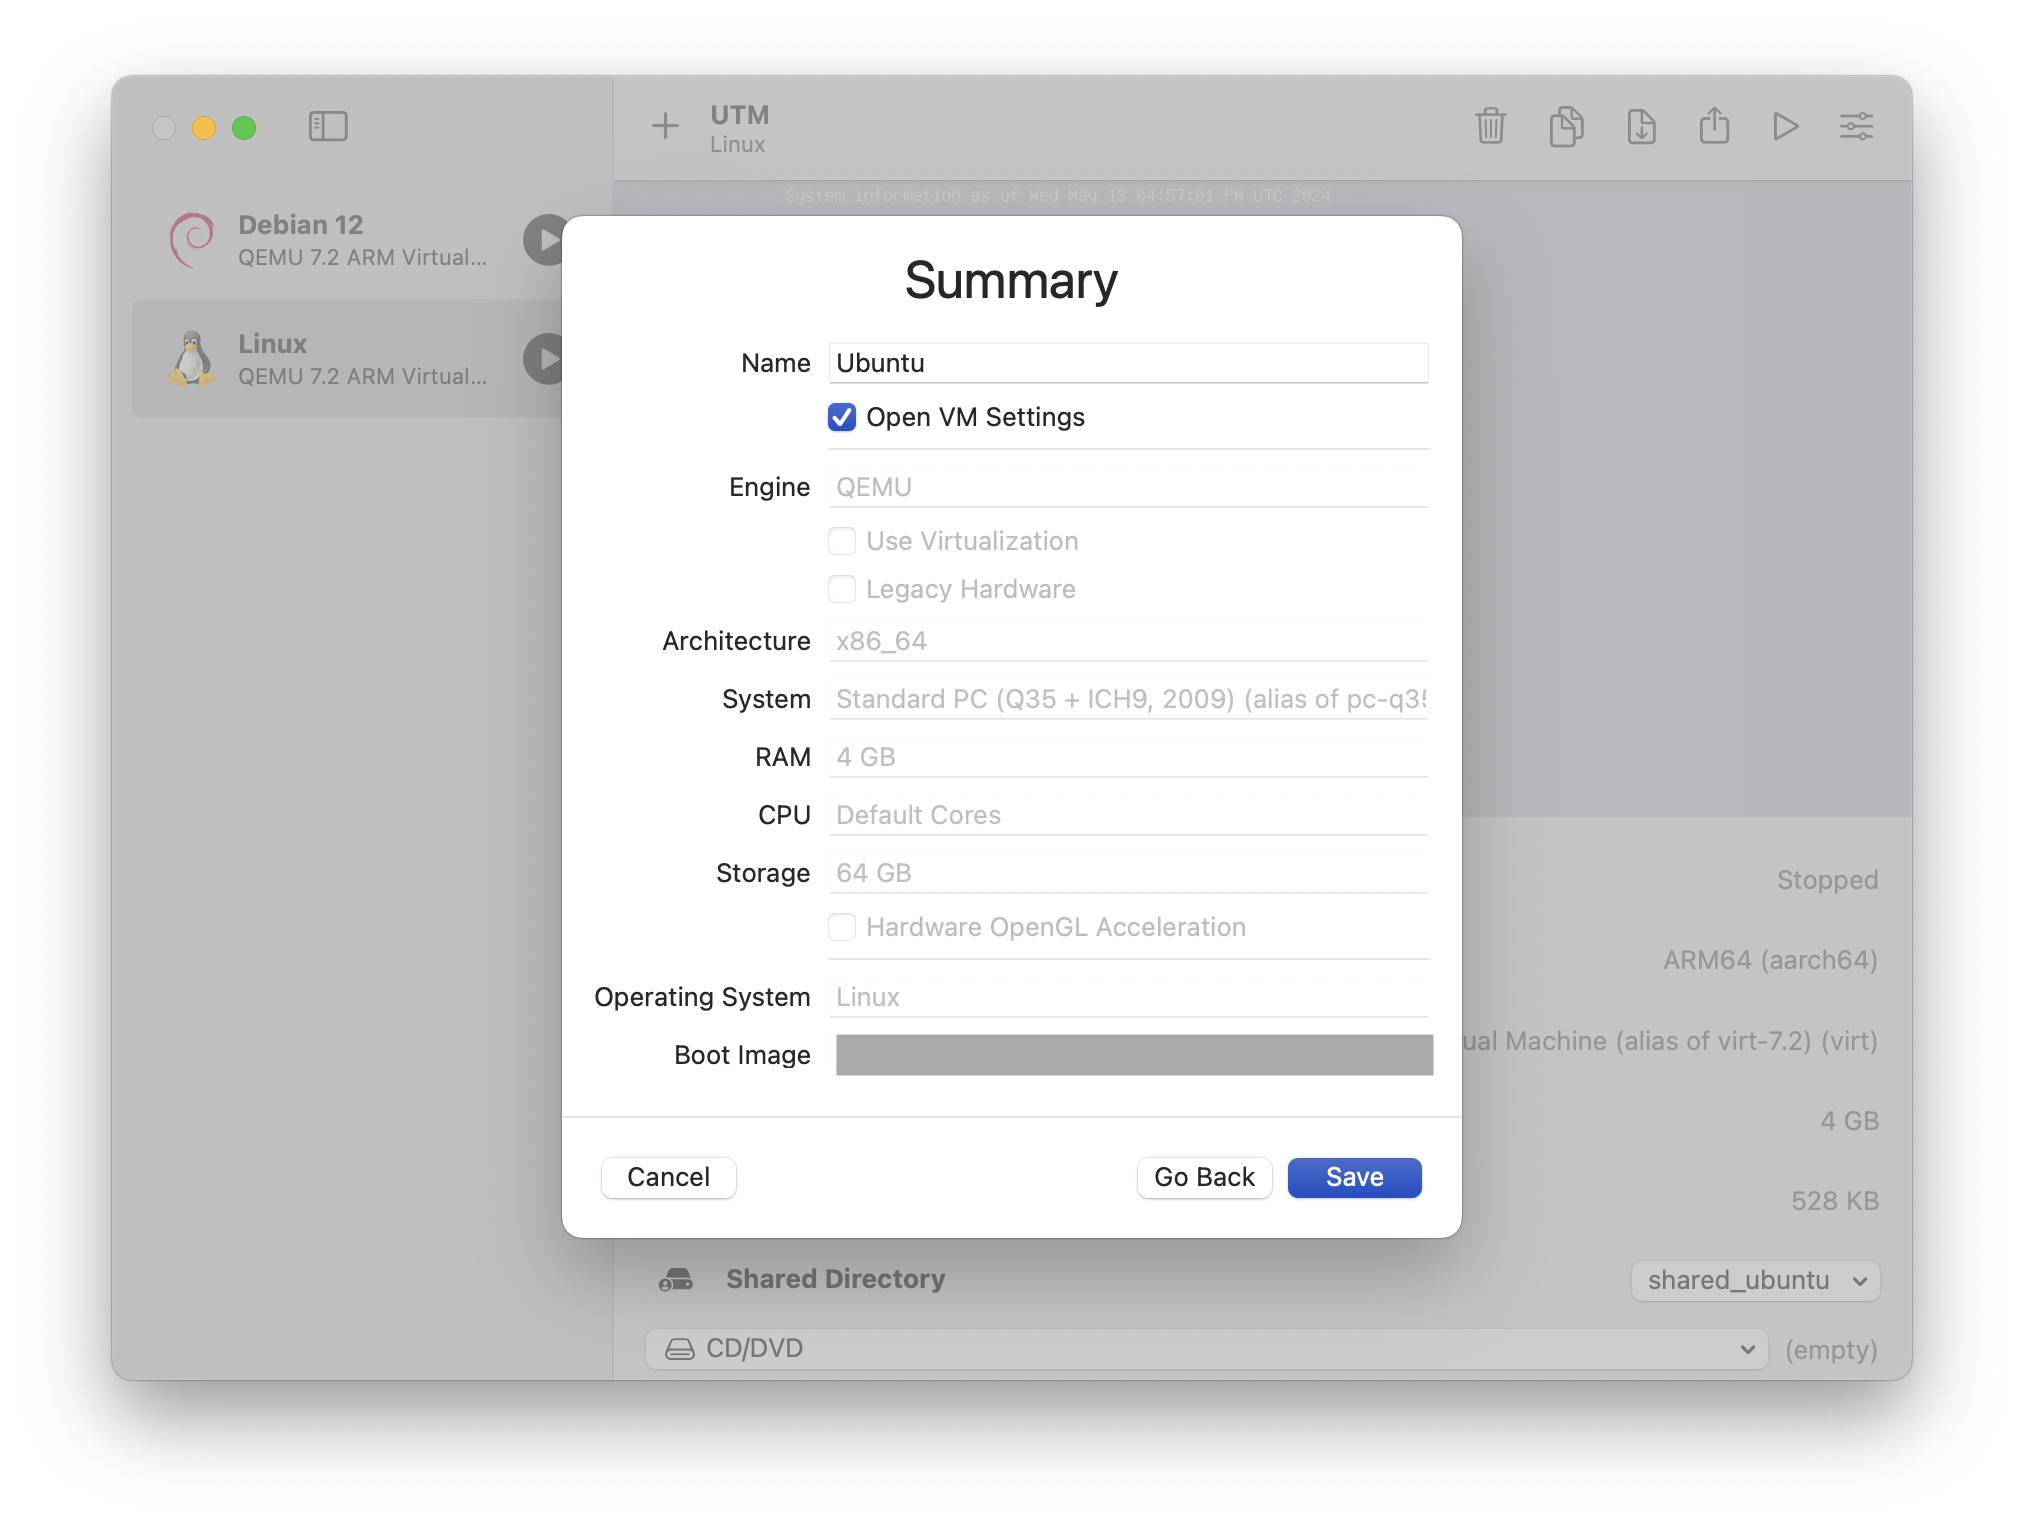
Open VM settings has been enabledConfigure VM Settings
- In the VM settings, select
QEMUin the side panel. - Disable the
RNG deviceand click "Save."
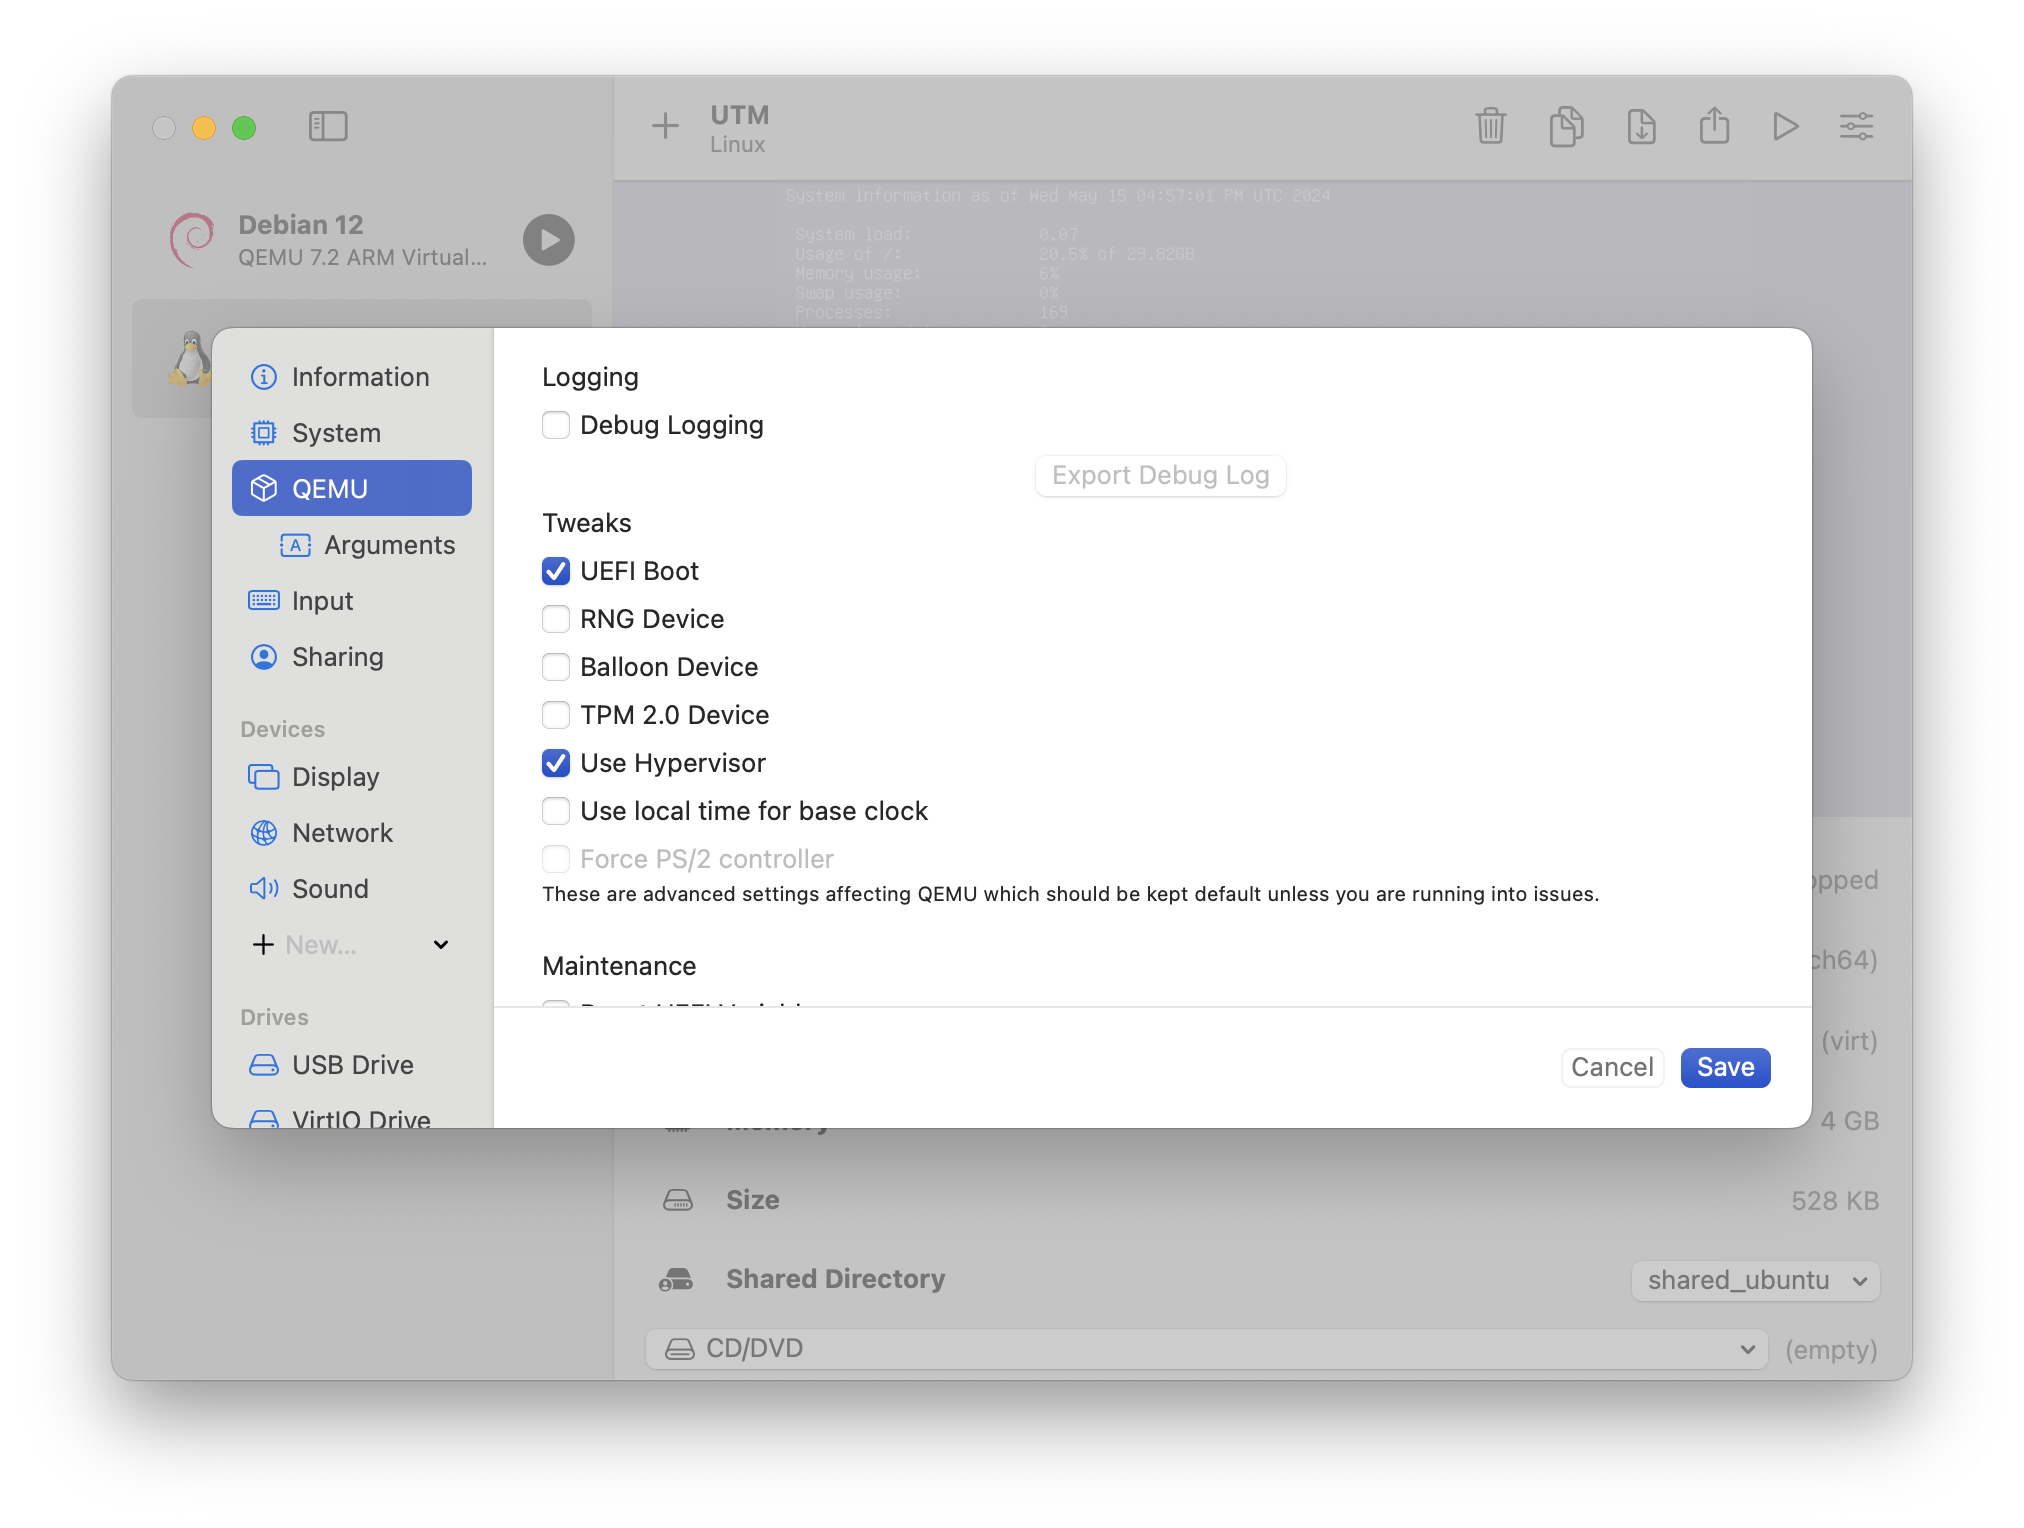
RNG device has been disabledStart the VM
- Start the VM and follow the prompts to install Ubuntu 24.04.
- After the installation, you'll be prompted to reboot. When you do, the VM will hang.
Adjust Display Settings
- Stop the VM.
- Open the settings and select
Displayin the side panel. - Change the Emulated Display card to
virtio-ramb-gl (GPU Supported)
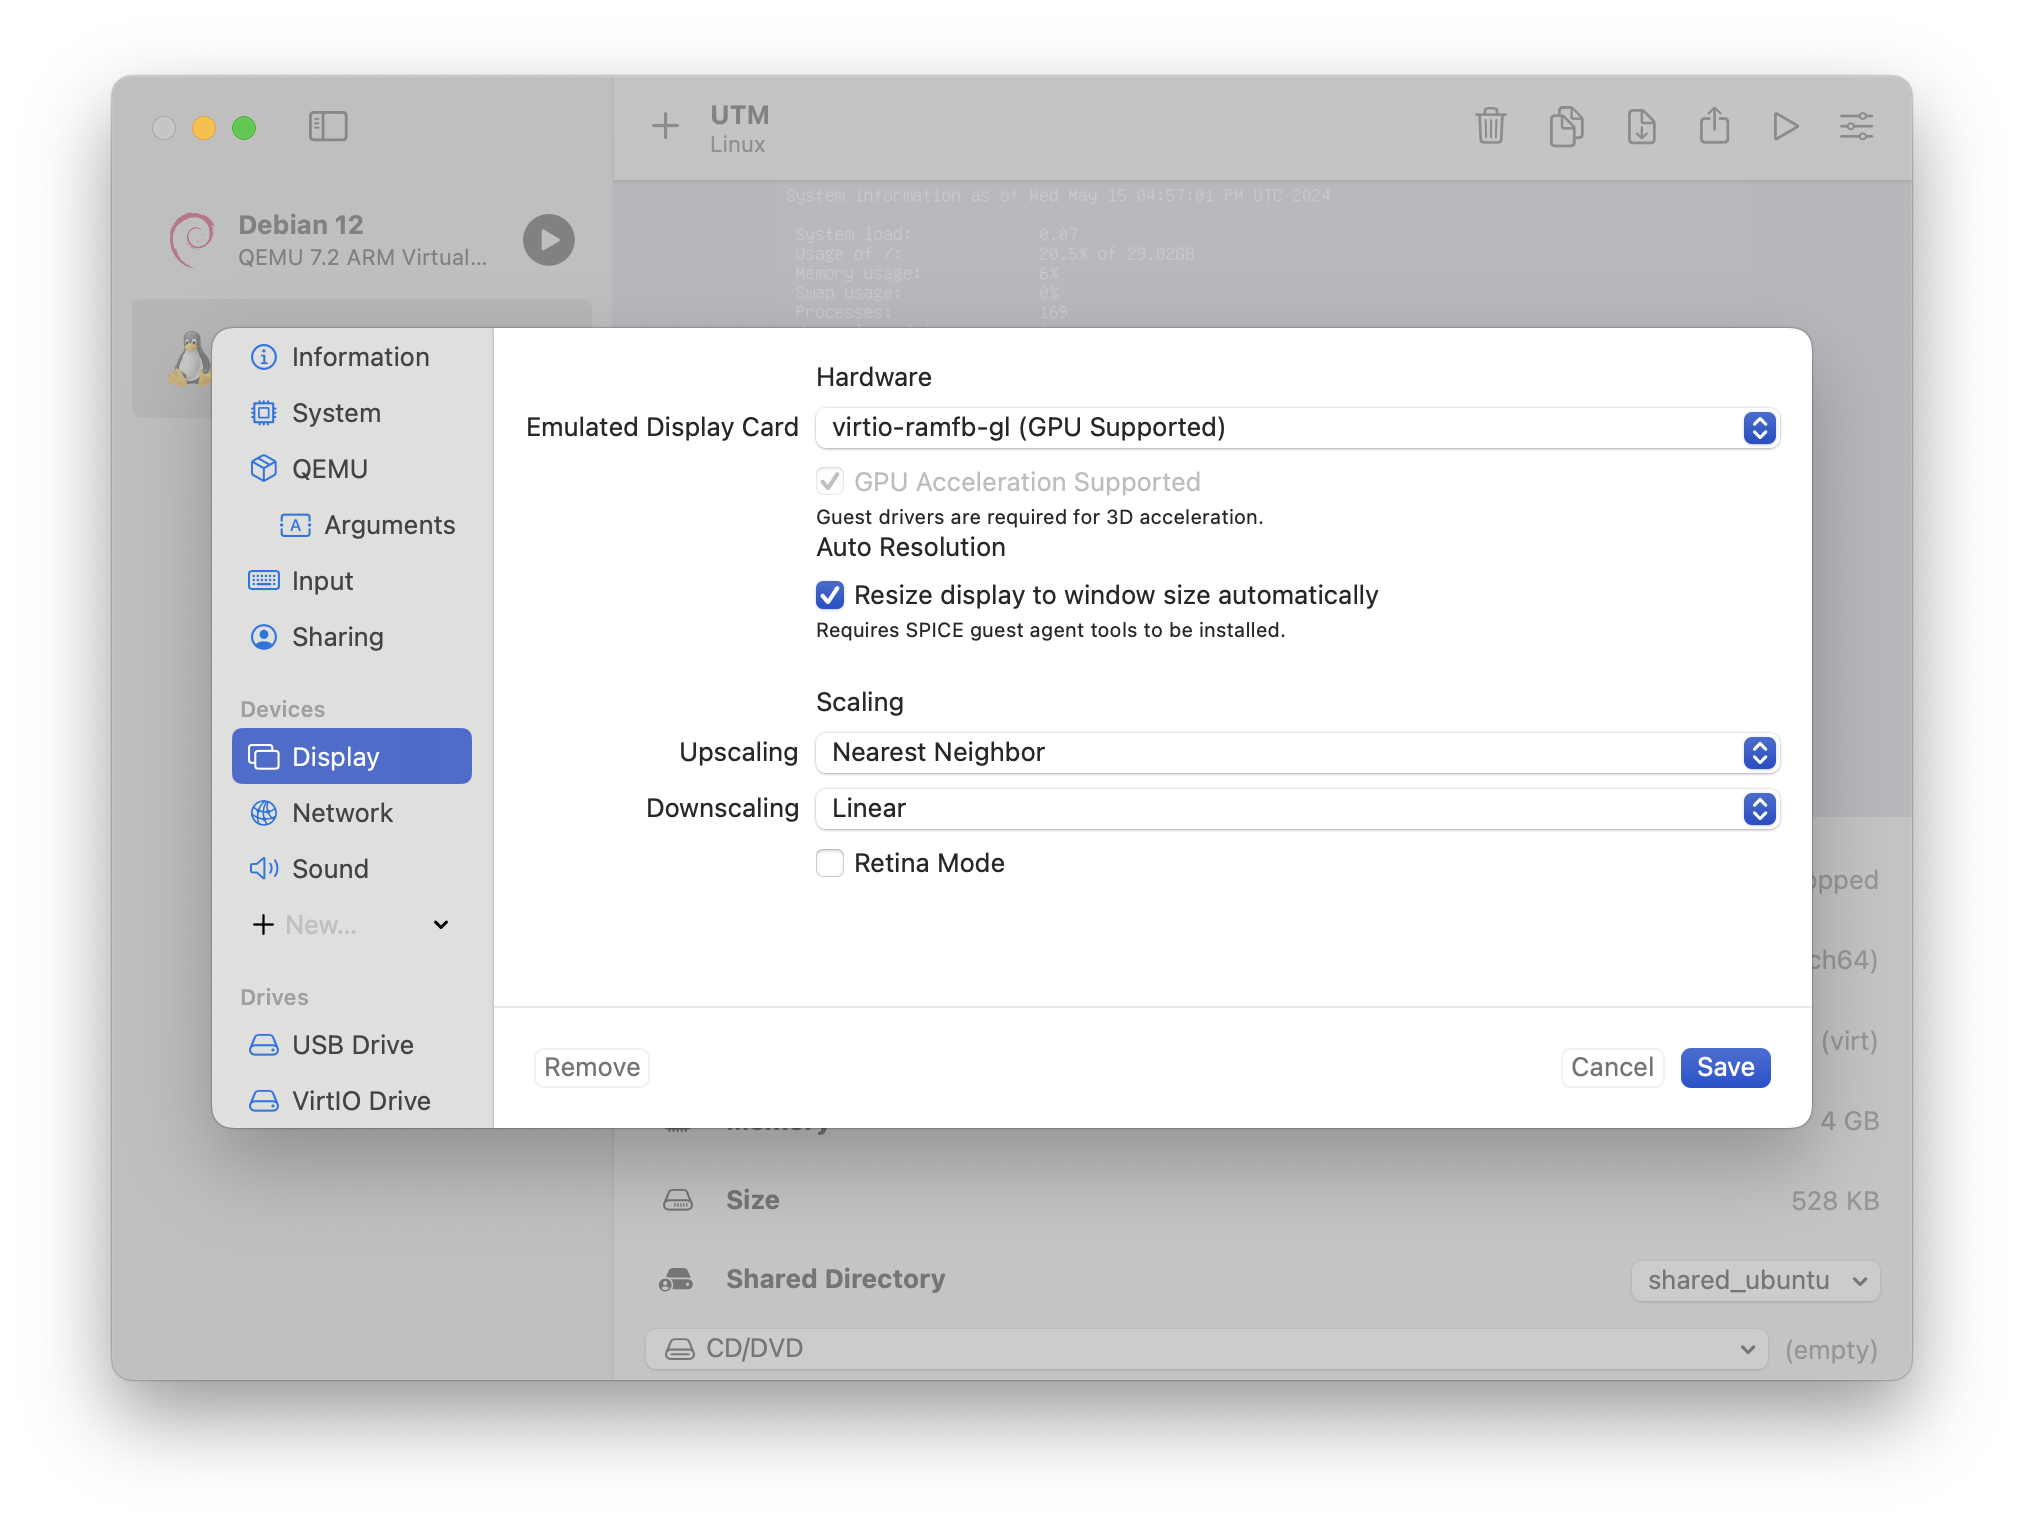
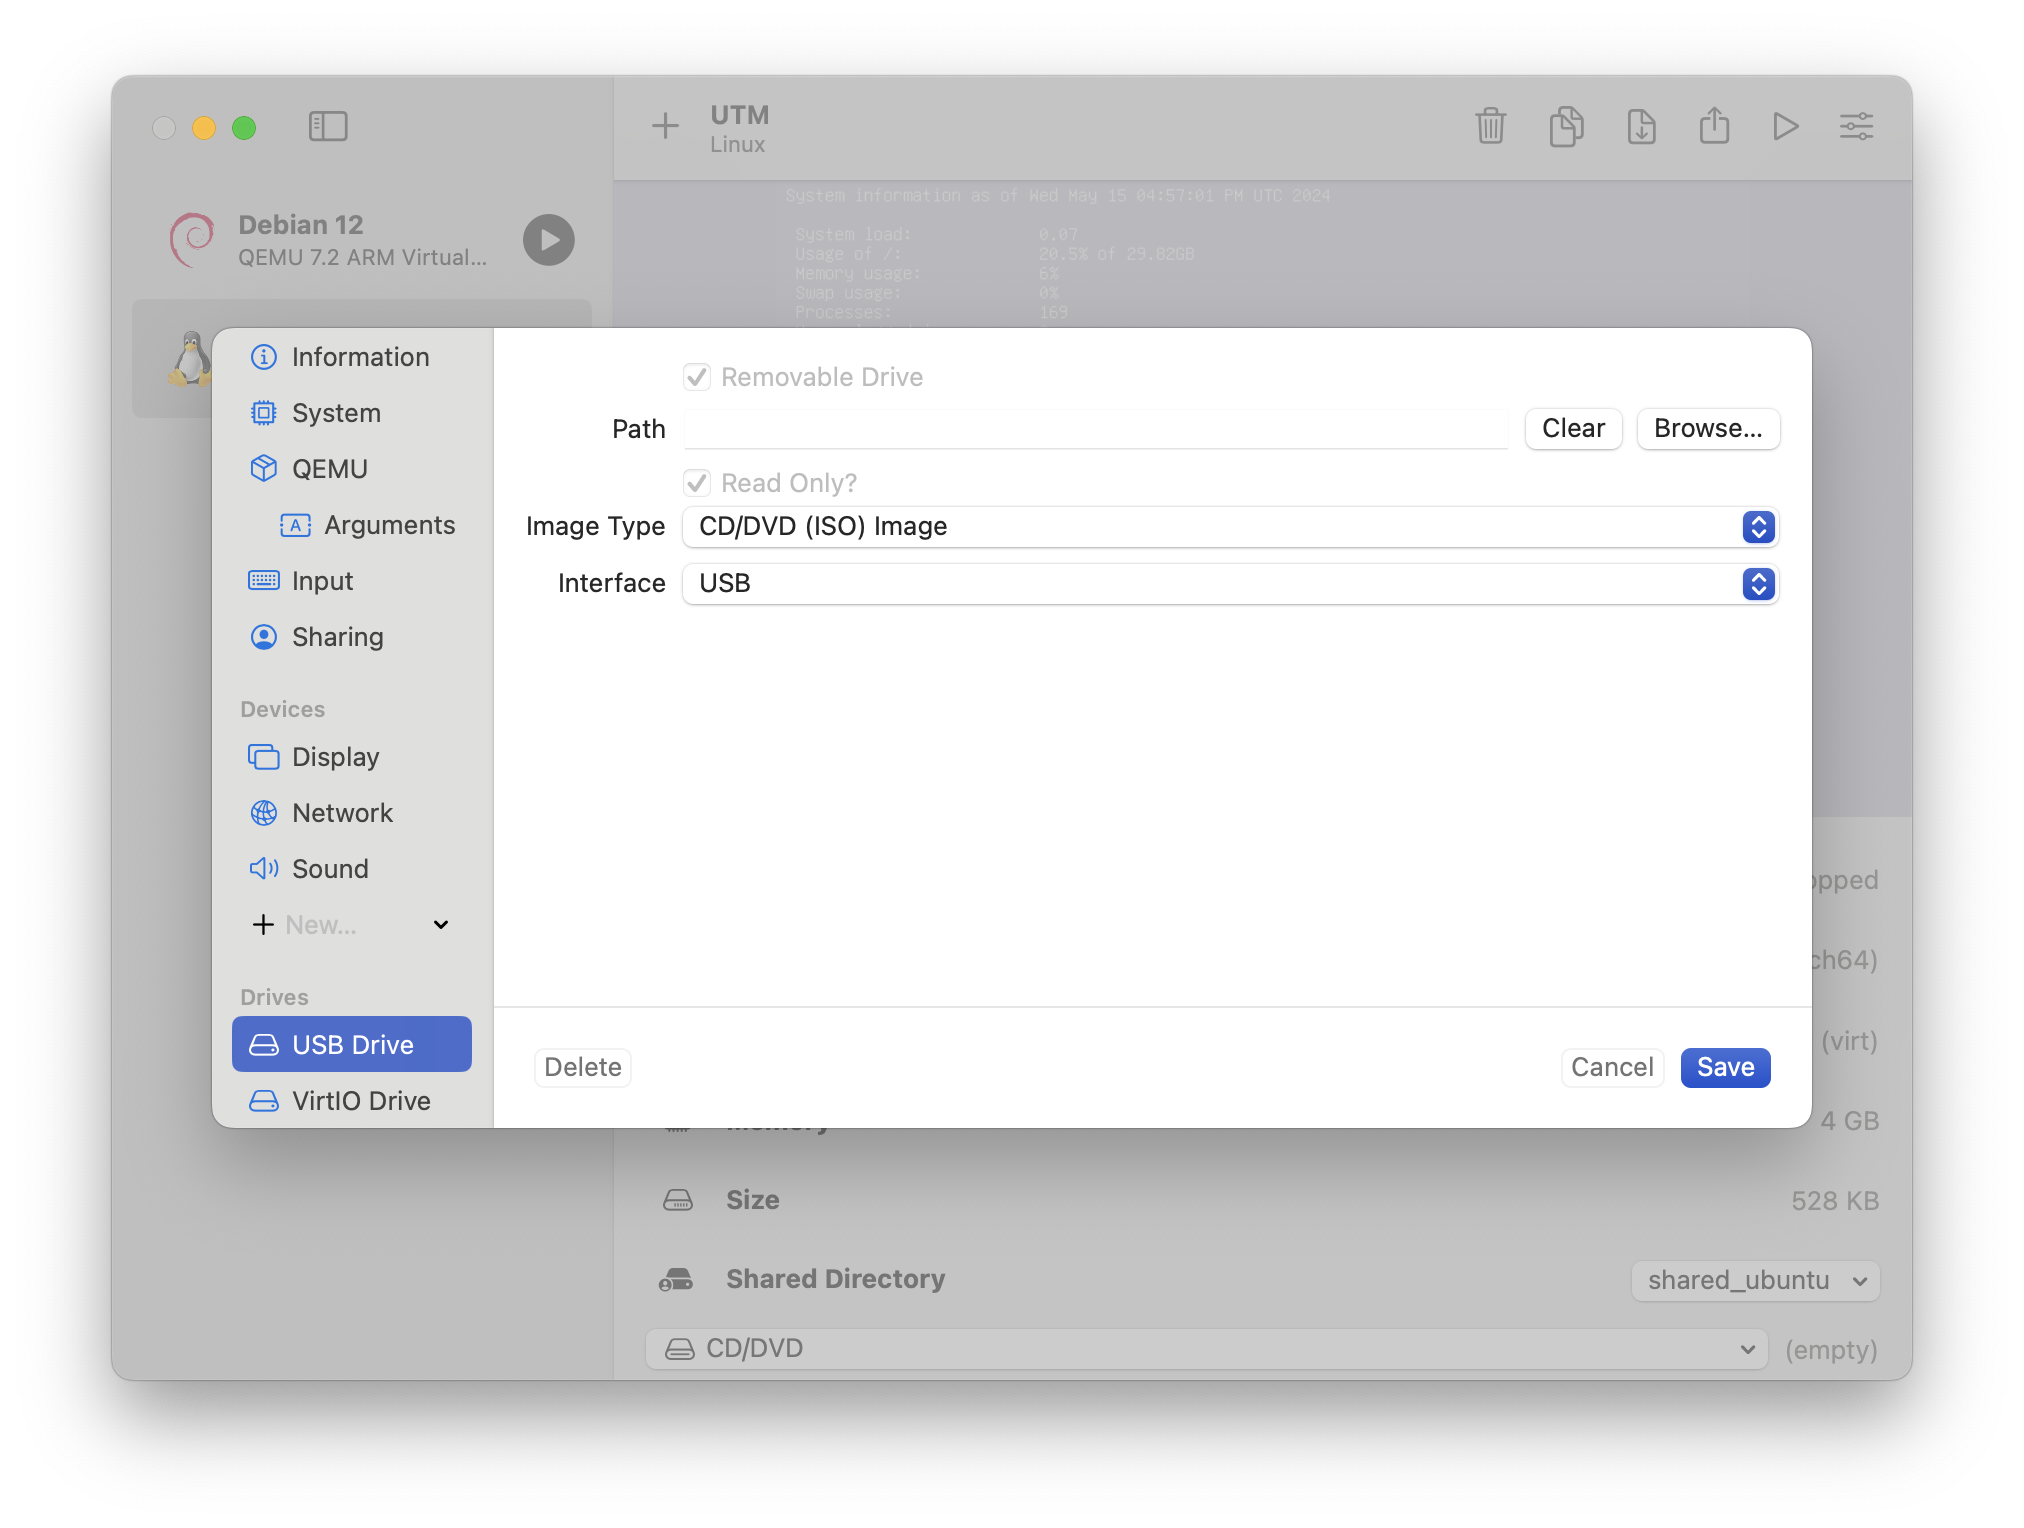
virtio-ramb-gl (GPU Supported) has been selectedClear Installer ISO
- Select
USB drivein the left-hand panel. - Clear the installer ISO and click
Saveto enable booting from your new VM.
Reboot the VM
- Restart the VM, and you should now be able to boot into the device at the terminal.
Optional: Install your preferred desktop environment
Ubuntu server doesn't have a graphical user interface out of the box. If you want or need one then you'll have to install it yourself.
At the terminal, update package lists
sudo apt update
Install your preferred desktop environment
XFCE (Xubuntu)
sudo apt install xubuntu-desktop
KDE (Kubuntu)
sudo apt install kubuntu-desktop
Gnome (Ubuntu)
sudo apt install ubuntu-desktop
If apt doesn't work for you, use tasksel:
sudo apt install tasksel
sudo tasksel
In the Tasksel menu, select your preferred desktop environment and follow the prompts to install.
Common UTM Problems: No Internet (DNS Issues)
While I did not experience any internet issues running Ubuntu in UTM I understand it might be common in some comparably configured arch Linux systems.
If you experience DNS issues (symptom: no internet connection), follow these steps to resolve the problem:
- Disable DNS Servers in Netplan Config:
- Open the netplan configuration file for editing:
sudo nano /etc/netplan/01-netcfg.yaml
- Find the
nameserverssection and comment out or remove any existing DNS server entries. Save the file and exit the editor if any changes are made.
- Adjust systemd-resolved to Use a Known Resolver:
- Open the systemd-resolved configuration file:
sudo systemctl restart systemd-resolved
- Find and uncomment the
DNS=line, then set it to use a known resolver like1.1.1.1(Cloudflare) or8.8.8.8(Google):
[Resolve]
DNS=1.1.1.1
- Save the file and exit the editor.
- Restart the systemd-resolved service to apply the changes:
sudo systemctl restart systemd-resolvedBy following these steps, you should be able to resolve DNS issues and restore internet connectivity.
Big thanks to Five (🇺🇸/🇩🇪) on the UTM Discord for the extra tips.